Access the ReportWriter screen by selecting Membership List Reports from the Reports sub-menu.
Data Fields refer to the information to be printed on the report. For a Birthday List, the data fields are "Name" and "Birthdate". For all records selected, the information in the fields "Name" and "Birthdate" will be printed. (The query allows you to select the records and is separate from the data fields.) To access the main ReportWriter screen, select Membership List Reports from the Reports sub-menu.
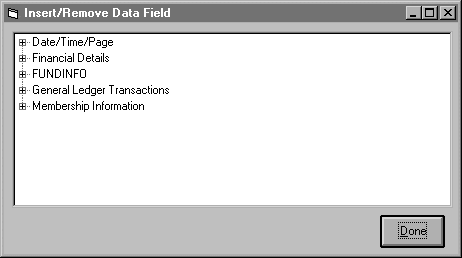
To insert Data Fields onto a report, select Insert then Data Fields from the main ReportWriter Screen to see the following screen:
The data fields above are organized in five categories. To open a category, click on the plus sign next to the category. All data fields available for that category will be listed in alphabetical order. To insert a data field onto your report, click the field name once so that it appears on the report layout. After fields have been added to the report, you can drag and drop them so that they will print on the paper in the order you would like. For example, once we have added data fields to for our Birthday List (which are in the Membership Information category), the ReportWriter screen will look as follows:

When the report is processed, the names will appear on the left with the corresponding birthdates out to the side.
To delete a data field, you can either click the field with the mouse and then hit the "Delete" key on your computer or you can click the field a second time on the Insert Data Fields display. Clicking fields in the display basically works as a toggle switch. If you click the field once, it appears on the report. When you click it a second time, it is removed from the report.